Honda CX 500 Forum banner

Canadian CX500 Cafe Racer Conversion

462K views 996 replies 87 participants last post by  2ndCXowner  
#1 · (Edited)
Hello everyone,

As with many members on here, I figure I should document my (slow) cafe racer build and maybe get your guys opinion along the way on a few things. I love getting inspiration from others builds and a lot of the things that I do to my bike come from other great members out there.

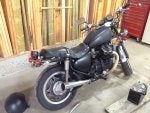
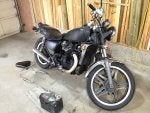
First a little back story: For as long as I can remember I've always wanted a motorcycle, but never had the money to get one. Last year I was searching the web when this 1980 cx500 custom caught my eye. What a cool looking bike I thought. Long story short I went and picked up my first ever bike and I was so happy. Got it for $250, and knew I had lots to do, starting off with replacing the stator. (Also the PO did not have the ownership and it was an american bike....that took a while to get worked out lol) Fixed it up and it ran great after a little tuning. At that point in time i just wanted to have a bike to ride so I didn't do much to make it look pretty, but now that i have a bit of extra cash (I don't really lol) I want to get it running better and looking fantastic.


Index

Page 1: Background, front fork rebuild, front fender chop, clip-on handlebars, new exhaust wrap and mufflers, new headlight and front signals.
Page 2: New engine new temperature gauge.
Page 3: Painted engine tags and clutch cover.
Page 4: New temperature sending unit.
Page 5: Radiator guard design.
Page 6: Engine paint prep, gauge design and radiator guard fabrication.
Page 7: Dummy lights and gauge redesign
Page 8: Muffler repacking, new tachometer and speedometer, engine painting, engine guards and shock painting, frame touch-up and engine mounting.
Page 9: E-fan mounting and wiring.
Page 10: Redesigned e-fan mounting and steering limits.
Page 11: Gauge and dummy lights wiring and gauge mounting brackets fabrication.
Page 12: Gauge brackets redesign and fabrication.
Page 13: Gauge brackets painting, dummy lights mounting, gauge mounting, lights testing and carb cleaning.
Page 14: Bike startup and oil leak.
Page 15: Cylinder cover painting and test drive.
Page 17: Rim tape installation.
Page 18: Bike drawing start, LED strip testing and tank designs.
Page 19: Rear fender and licence plate holder design.
Page 20: Tank designs, rear fender redesign, bike disassembly and tire hugger design.
Page 21: Tire hugger design and brake light switch bracket fabrication.
Page 22: Battery box design and fabrication.
Page 23: Battery box fabrication and painting and rear fender support tubes fabrication.
Page 25: Rear fender support tubes and rear fender fabrication.
Page 26: Rear fender fabrication.
Page 27: Rear fender mounting bracket fabrication and start of rear fender assembly.
Page 28: Rear fender assembly, test fit and more fabrication.
Page 29: Licence plate bracket design and fabrication, final rear fender assembly, turn signal testing/concept and rear frame modifications.
Page 30: More rear light ideas.
Page 31: Rear hoop and signal mounts fabrication.
Page 32: Rear hoop fabrication continued, new shocks and signal test fit.
Page 34: Rear hoop mock-up, shock limiters, rear hoop modification, rear fender mounting bracket clean up, front electronic pan fabrication.
Page 35: Rear electrical pan fabrication, license plate bracket fabrication and rear fender test fit.
Page 36: Licence plate lights, regulator and starter solenoid mounting and wiring and rear tire hugger fabrication.
Page 39: Rear brake pad replacement, rear hub painting, frame clean up and welding in rear hoop.
Page 40: Priming and painting frame.
Page 41: Getting tire hugger and rear fender ready for painting.
Page 42: Rear fender inside coating.
Page 43: Rear fender and license plate painting, new shock spring coating, shock assemble and install and rear fender, tire hugger and turn signal mounting.
Page 45: 12 Volt time delay modules.
Page 46: Wiring and painting of rear tire hugger and electrical pans.
Page 47: Mounting tire hugger and electrical pans and wiring battery and starter solenoid.
Page 48: Cleaning up electronics and wiring rear turn signals.
Page 49: Pod filters.
Page 50: Header breather tubes and front fork stiffness modifications.
Page 51: New LED brake and running light.
Page 52: Brake flasher module.
Page 53: Brake light mounting and electronic testing.
Page 55: Tire choices.
Page 57: Disc lock.
Page 58: Final Tank designs.
Page 60: Seat pan mock up and fabrication.
Page 62: Changing tires and paint supplies.
Page 63: Tank stripping and seat upholstered.
Page 64: Priming gas tank and new ignition switch.
Page 65: Painting gas tank.
Page 67: Wet sanding tank.
Page 68: Fixing tank mistake, building ignition switch, final 2K clear coat on tank and buffing/polishing tank.
Page 69: Bike pictures and tire hugger mounting clarification.
Page 70: More bike pictures.


Anyways, here are some pictures from before:

How it looked when I bought it:


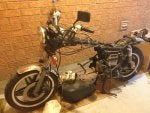
First time taking the engine out:


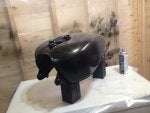
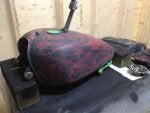
Repainting the tank (temporary):


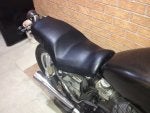
Redone seat cover (temporary):


The bike as it stood last year before any serious mods:

 
#800 ·
LOL I was confused there for a second Murray as I was referring to what Kameron mentioned :p It is a crowd funded type of product development. Although an actual kick starter would indeed be interesting!

I think CXPHREAK has the best idea though!
 
#803 ·
No worries lol :)

Yeah it's a great way for people to fund their designs and products. Had it been operational a long time ago, I am sure your carbs would have been a big hit!
 
#805 ·
So a little while back, myself and a group of friends from my school went on a little bike trip. Nothing too long, but a nice day trip all the same. The highlight of the trip was visiting Forks of the Credit, which is a really nice winding road in Ontario (I'm sure some of you have heard of or ridden it)

First place we stopped at was in West Montrose, a little town that is famous for having the longest covered bridge in Ontario. It is nicknamed the "Kissing Bridge" because couples would be hidden from view while driving through it. However, a group of guys on motorcycles have a bit different of an idea....rev the engine to hear how pretty your bike sounds :p


Then we went up north a bit and stopped in at a nice little gas station and restaurant:


After which we split off and headed to the Forks. This road is rather short, but has some very nice turns and twists in it, including a very sharp inclined hairpin turn. Ripped back and forth on it a few times and then stopped to grab some action shots:


It was a fun day, and the rain held off which was good. If you're around the area you should check it out, it's a great road for bikes. There is also another road near there called River Road which is very good too!

In other news, I am currently on my co-op work term and have access to a very nice (and expensive) 3D printer. So expect a few parts for my bike to be coming soon ;)
 
#806 ·
Hey lookin good .

You make that bike look smallish.

rear tire looks really close, does it hit .

It looks like you need a little more spring.;)
 
#807 · (Edited)
At 6'3" tall, it does take some folding of the body to fit onto the bike :p but I couldn't care less, it's so much fun to ride and rip around on that I don't mind not being able to ride it for more than 2 hours straight. For that I will buy a cruiser!

Little known fact: The greatest way to improve performance on these bikes is not a set of Murrays carbs..........it is something much more complex and challenging.........a diet ;) Something I am currently on lol. As the pounds go down, my fuel mileage and acceleration go up!

The tire is about as close as you can get it without rubbing. When bottomed out it is less than 1/4" from the wheel well, and I have had no issues with rubbing yet. I have the springs at the softest setting right now though, and if needed I can always increase the preload. But a little more spring probably wouldn't hurt either!
 
#809 ·
Oh yeah, I forgot to mention the ice-cream!!! :eek: That is the best part for sure! Nothing like a refreshing cone after riding all day.
Yeah the bridge is nice, although not super close to the Forks unfortunately.
 
#810 ·
Time for a tiny update:

First things first, this is actually my 1000th post on this forum :eek:ccasion18: :sith: :eek:ccasion18: so I guess that makes me somewhat of a special person now :p All kidding aside though, this forum is still one of the best places for helpful info, kind people, and incredible stories, and I am so glad to be a part of this great community! Here's to another 1000 posts (assuming I don't bore you all to death lol)

Secondly, I noticed that my thread has over 100,000 views!!! I'm really shocked and humbled by how much attention my build has got, and how positive everyone's comments have been along the way. I definitely wouldn't have the bike where it is now without the help of all you members out there that continue to answer my questions, even though they've been asked a million times before. Not to mention everyone who has chimed in when I did something stupid haha. You guys all rock!!! :headbang:

And since everyone likes pictures, I thought I would show off my new helmet that I purchased. It is the Roof Boxer V8 in gloss black. It's a fiberglass full face modular helmet that has a very unique look and feel to it. I love the jet fighter styling, and thought it would go well with the bike. Unfortunately the gloss black was all they had left at the place I bought it from (hard to find in Canada as the helmet is made and sold in France) but it looks alright I think.
In order to get it to match my bike a bit more, I used some of the same reflective tape that I put on my rims and made a few designs on the helmet. Not only does it look good during the day, but at night my head lights up like a light bulb now!


And in other news, I am working on something cool for my bike that will utilize the 3D printer at work. I'll keep it hush hush for now, but it has something to do with LED's, resin and the moto 360 smart watch.....
 
#811 ·
Build quality and photography is stupendous! Some mad skills you've got there, Micah. Is there anything you can't do?! :notworthy:

Your build is being featured in the BikeBuilds.net directory here: Motomicah's CX500 Cafe Racer Build.
We’re currently displaying only a reduced-size photo (similar to what you’d find in Google Images).
We'd like to ask for your permission to publish the original full-size image with your build listing.

If anyone would like to have a build of their own listed, just shoot me a PM with a link to the build thread and we’ll take care of the rest.
If you wish to add your build personally, please feel free to peruse our Submit feature. No registrations required.

Admins, kindly delete this post if deemed inappropriate.

Al
 
#812 ·
Hey Al, that's awesome! Thanks so much for publishing my build! You have my permission to use the full size images and if there is anything else you need just let me know!
Who knows, maybe if my build gets enough attention I might be able to make a name for myself in the custom motorcycle industry :p
 
  • Like
Reactions: Volaussie and OCR
#814 ·
I do believe it is time for a little update as it's been quite a while since I posted on this thread :shame:

As the riding season has been coming to an end, I have been stuck in a limbo between riding and working on the bike. I can't take it apart because I want to ride, but I can't ride it all the time because of the weather. However, I do believe the last ride has been had unfortunately :(
In a poetic twist, I was able to snap some pictures of the bike by a small lake as the sun was setting....just like the sun is setting on this years riding season.


And I had some fun with filters and settings:


So you all are probably wondering what is next for the Canadian CX500 Cafe Racer? Well, the next thing I want to do is clean up all the handlebars and controls up front. Not to mention cleaning up the wiring a bit as I did it rather quickly the first time around. The issue is this though, I can't spend too much more money on the bike as I've already spent more than I wanted to haha. But I should be able to do it all for relatively cheap as wires and connectors aren't that expensive. And I am still working on those 3D printed parts....just got sidetracked a bit working on other projects.
Either way, there should still be more to come over this winter!
 
  • Like
Reactions: motormann and OCR
#815 ·
So I was looking around at different builds for inspiration and came across a few that really stuck out to me for one main reason ..... the headlight fairing.

Originally I was never a fan of the little fairing due to how high it stuck up on other builds, but on the recent build from mitchwitkamp as well as the build from the guys over at Ton Up Garage you can see how streamlined and clean it looks on the bike.


So taking a few design cues from various builds I believe I am going to make my own little headlight fairing. I don't have the skill to make it out of metal, but what I am going to try and do is model the design in SolidWorks, 3D print it out of ABS (it might have to be in parts due to my limited print volume) and then reinforce the fairing with fiberglass.

That is the plan at least, we shall see how it goes :p As usual I will make sure to keep you all updated on every step of the process!
 
#817 ·
That tutorial was fantastic Greg!! I might actually mock mine up first like you did, and also use the Velcro strips as that was very clever!
I like the idea of putting some trim on the inside section of the part that goes around the headlight, just to close the gap and keep wind out.

All in all, I think the fairing looks great, thanks for sharing and giving me some more ideas!
 
#818 ·
Alright lets get some pictures rolling through here shall we!

First things first, before working on the headlight fairing, I wanted to complete the design for the Moto 360 integration. For those of you who don't what what a Moto 360 is, it is basically a smartwatch that is tethered to your phone and can communicate with it in a variety of ways. For me, the main way I'll be using it is for the Google Maps feature. It will then become my very own mini "GPS" unit for my bike.

I like going for rides to places I haven't been yet, but the fear of always getting lost, then trying to find my way home by stopping every so often to look at my phone, really limited how far I could go. Hopefully with this little screen I will be able to find a nice route that works for me.

Now, technically this is not a real GPS as it only uses the cellular networks and not actual satellite positioning, but for what I need it for, it will do just fine! The main reasons why I didn't want to buy a regular GPS were the cost and the general size of the units. They are big and I don't want to be cluttering up my bike too much. So this seemed like a nice compromise.

Anyways, I was able to purchase a Moto 360 used from Kijiji. I didn't need a new unit so long as it worked fine and didn't have any large scratches on the screen. This thing is awesome even just as a watch!


Here you can see the Google Maps app running. The screen is large enough to see the roads and directions, but if need be, you can show a simplified version of the directions which is basically just the next step in your route with a nice little arrow.


Now comes the fun part.....dismantling things! The watch charges via a wireless induction coil, and this is good because it means the charger can be made fairly slim. However the stock charger from Motorola has a cradle molded in which is way too large to fit anywhere. So I gutted the charger and removed the circuit and charging coil.


Then it was all design work. This part took forever, not only because I wanted it to look good, but also because of the restricted space I have up front. Even though this unit is small, everything needed to be squished in so it would all fit neatly. The biggest challenge was making a small case for the wireless charger. It had to fit snugly, and be positioned so that the wires were routed and it didn't interfere with anything. Definitely rattled my brain for many hours coming up with a solution!

As you can see, I also wanted to throw in my own little flavor with putting my alias on the bike :p There will be another cool feature with this name, but I will show it off later!

So for now here is the design. You can see how it would roughly look like with all the gauges and whatnot simplified:


And the design as it stands:


Another big challenge was making a way to press the button on the side of the watch. This turns it on as well as controls a few features, so it was necessary to have access to it. My solution is to have two caps that will go on the outside of a small channel with a flexible wire or cable between them. When the one on the outside is pressed, the inside one should push against the button. I will also make the top button a lot cleaner looking to match the outside of the housing. Seemingly simple, but still challenging to design none the less:


That is about all for now, but I will hopefully be able to 3D print all the components in the next little while. That's the point where things start to get interesting! :D
 
  • Like
Reactions: OCR
#819 ·
I was able to print off the parts yesterday. I have to say, 3D printing is one of the greatest technologies ever developed!!! And the machine we have at work is a beast! For anyone interested, it is the Objet Eden500V.

Here are the parts about halfway through the printing process:


And after a total of around 5+ hours of printing they were done:


When they come off the printer you can see that there is a large amount of support material on the components. This is needed for the printer to print overhangs and floating sections, and it washes off with a pressure washer:


After a little bath, here are the completed parts. You can see that I printed off a test Moto 360 too just in case I need it for future ventures. The parts came out great though, and I think they look fantastic!


I did a few test fits yesterday as well....and it fits buttery smooth :toothy10:

More to come in the next little while!
 
#820 ·
Did some test fitting of the mount and I am very happy with how it fits around the bike's gauges and whatnot. Slides right in place and lines up really nicely with all the components (minus the ignition switch, which I will explain below).


The wireless charger fits very nicely into the housing I designed, with just a slight modification needed for the protruding wires to clear the housing.


So after looking at the design a bit, and playing around with the unit, I noticed a few things that needed to be changed and so I decided to modify the Moto 360 mount slightly.

First thing that happened was the lip near the edge of the screen cracked as I was pushing the watch into place. I was worried about it doing that seeing as it was less than 1mm thick (the reason being I wanted the top of the mount flush with the screen). So what I did was thicken up the area as well as add some fillets to stop the cracks from forming. This seems to be working out very well for now.
Secondly, I didn't notice it before, but the ignition switch on the bike isn't perpendicular to the rest of the surrounding area, rather it tilts forward a bit. So I modified that portion of the mount and gave clearance for the tilted switch.
Thirdly, I found that having the button on a steep angle really made it hard to get any tactile feedback from the button on the watch. So I opted to have the button go in a pretty much straight line straight out to the side. Not only does the button feel better now, it is out of the way a bit more too.
And lastly, the charger housing initially just set in place with only friction holding it there. I was going to use some adhesive to keep it in place, but I wanted to be able to remove the watch fairly easily for various reasons. So I added a little mechanism that latches the charger in place once it is sent in the housing and twisted. Simple, but very effective!

Below you can see the two units. The newly designed one is on the left. You can see the majority of the changes between the two designs. This should be the final design hopefully!


Here is a picture of the button portion. It is basically an inside and outside cap with a wire between them. Works a lot better now that it is more of a straight line from end to end.


As of now the watch fits in very nicely, and the functions all work good. Next step is to get it ready for paint and the other little surprise....
 
#822 ·
Well now, what fun would it be if you didn't have any competition? :p

Also, I would like to point out how much of a fan I am of your seat! I have seen a few similar ones and I am really starting to like the look of the hump incorporated into the seat.....maybe I shall make another seat in the future......
 
  • Like
Reactions: Volaussie
#823 ·
So things have been kind of hectic since last Saturday. My dad had a pretty serious stroke, so I've been busy driving back and forth to the hospital as well as taking care of some things at home. Hopefully it won't delay the mods on the bike too much, but family comes first in these matters, so updates will be slow over the next little while.

After doing some more testing with the new 3D printed part and seeing how everything worked out very nicely, I decided to move on to the next step; filling in the name with clear resin!

First step was to mask off the front portion of the letters:


Then pour the resin into the cavity I had designed. I only filled it half way to accommodate the LED lights later on:


Then I let it sit for 24 hours before removing the tape. This is when I noticed that I had a lot of large bubbles trapped at the top of the lettering due to the small crevices and thick resin not being able to flow into them:


So I masked off around the top portion of the letters and poured some more resin to fill in the holes:


After sanding with 600 grit then 1000 grit sandpaper, I was able to get a very smooth surface. So smooth in fact, that the letters can hardly be seen if the light is blocked from behind:


Here you can see how clearly the letters show up when light is shone through them though! So just imagine this.....but in red.......


That's all I've really had time to do this week, but hopefully I will be able to get a bit more done in the next little while.
If I don't post anything new before the holidays, Merry Christmas to everyone!
 
#824 ·
I hope your dad gets well soon. Hang in there.

It keeps getting better :)

I've never liked my stock subframe and bought the seat in advance. Just to stimulate myself to find a solution to make it fit and look a million bucks! The bump is subtle and makes it look a little more sporty.

And merry Christmas to you mate, your family and everyone who reads this.

sent via Tapatalk
 
#825 ·
Thanks Volaussie! It looks like he is improving slowly each day! Just have to keep our thoughts and prayers positive :)

LOL, I like the way you think! It really helps to motivate yourself when you've already spent the money on a part and just need to find a way to mount it haha. But I do agree, it does make it look very sporty. I think once I get finished with the headlight fairing I might look into making another seat so that the bike can have a bit more of a cafe racer look. I'll keep the other seat when I want to ride two-up of course though.

Thanks again buddy!
 
  • Like
Reactions: Volaussie