Honda CX 500 Forum banner

Canadian CX500 Cafe Racer Conversion

462K views 996 replies 87 participants last post by  2ndCXowner  
#1 · (Edited)
Hello everyone,

As with many members on here, I figure I should document my (slow) cafe racer build and maybe get your guys opinion along the way on a few things. I love getting inspiration from others builds and a lot of the things that I do to my bike come from other great members out there.

First a little back story: For as long as I can remember I've always wanted a motorcycle, but never had the money to get one. Last year I was searching the web when this 1980 cx500 custom caught my eye. What a cool looking bike I thought. Long story short I went and picked up my first ever bike and I was so happy. Got it for $250, and knew I had lots to do, starting off with replacing the stator. (Also the PO did not have the ownership and it was an american bike....that took a while to get worked out lol) Fixed it up and it ran great after a little tuning. At that point in time i just wanted to have a bike to ride so I didn't do much to make it look pretty, but now that i have a bit of extra cash (I don't really lol) I want to get it running better and looking fantastic.


Index

Page 1: Background, front fork rebuild, front fender chop, clip-on handlebars, new exhaust wrap and mufflers, new headlight and front signals.
Page 2: New engine new temperature gauge.
Page 3: Painted engine tags and clutch cover.
Page 4: New temperature sending unit.
Page 5: Radiator guard design.
Page 6: Engine paint prep, gauge design and radiator guard fabrication.
Page 7: Dummy lights and gauge redesign
Page 8: Muffler repacking, new tachometer and speedometer, engine painting, engine guards and shock painting, frame touch-up and engine mounting.
Page 9: E-fan mounting and wiring.
Page 10: Redesigned e-fan mounting and steering limits.
Page 11: Gauge and dummy lights wiring and gauge mounting brackets fabrication.
Page 12: Gauge brackets redesign and fabrication.
Page 13: Gauge brackets painting, dummy lights mounting, gauge mounting, lights testing and carb cleaning.
Page 14: Bike startup and oil leak.
Page 15: Cylinder cover painting and test drive.
Page 17: Rim tape installation.
Page 18: Bike drawing start, LED strip testing and tank designs.
Page 19: Rear fender and licence plate holder design.
Page 20: Tank designs, rear fender redesign, bike disassembly and tire hugger design.
Page 21: Tire hugger design and brake light switch bracket fabrication.
Page 22: Battery box design and fabrication.
Page 23: Battery box fabrication and painting and rear fender support tubes fabrication.
Page 25: Rear fender support tubes and rear fender fabrication.
Page 26: Rear fender fabrication.
Page 27: Rear fender mounting bracket fabrication and start of rear fender assembly.
Page 28: Rear fender assembly, test fit and more fabrication.
Page 29: Licence plate bracket design and fabrication, final rear fender assembly, turn signal testing/concept and rear frame modifications.
Page 30: More rear light ideas.
Page 31: Rear hoop and signal mounts fabrication.
Page 32: Rear hoop fabrication continued, new shocks and signal test fit.
Page 34: Rear hoop mock-up, shock limiters, rear hoop modification, rear fender mounting bracket clean up, front electronic pan fabrication.
Page 35: Rear electrical pan fabrication, license plate bracket fabrication and rear fender test fit.
Page 36: Licence plate lights, regulator and starter solenoid mounting and wiring and rear tire hugger fabrication.
Page 39: Rear brake pad replacement, rear hub painting, frame clean up and welding in rear hoop.
Page 40: Priming and painting frame.
Page 41: Getting tire hugger and rear fender ready for painting.
Page 42: Rear fender inside coating.
Page 43: Rear fender and license plate painting, new shock spring coating, shock assemble and install and rear fender, tire hugger and turn signal mounting.
Page 45: 12 Volt time delay modules.
Page 46: Wiring and painting of rear tire hugger and electrical pans.
Page 47: Mounting tire hugger and electrical pans and wiring battery and starter solenoid.
Page 48: Cleaning up electronics and wiring rear turn signals.
Page 49: Pod filters.
Page 50: Header breather tubes and front fork stiffness modifications.
Page 51: New LED brake and running light.
Page 52: Brake flasher module.
Page 53: Brake light mounting and electronic testing.
Page 55: Tire choices.
Page 57: Disc lock.
Page 58: Final Tank designs.
Page 60: Seat pan mock up and fabrication.
Page 62: Changing tires and paint supplies.
Page 63: Tank stripping and seat upholstered.
Page 64: Priming gas tank and new ignition switch.
Page 65: Painting gas tank.
Page 67: Wet sanding tank.
Page 68: Fixing tank mistake, building ignition switch, final 2K clear coat on tank and buffing/polishing tank.
Page 69: Bike pictures and tire hugger mounting clarification.
Page 70: More bike pictures.


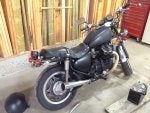
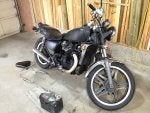
Anyways, here are some pictures from before:

How it looked when I bought it:


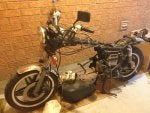
First time taking the engine out:


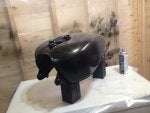
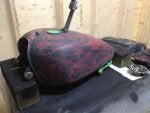
Repainting the tank (temporary):


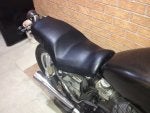
Redone seat cover (temporary):


The bike as it stood last year before any serious mods:

 
#682 ·
You know, with as much time as I have to ponder what to do, when it comes time TO do, I sometimes mutter to myself why the hell did I start this mess? It was s nice rider to begin with...

But I digress. My current stream of over thought stems from your great retro tank paint.

I love the 900f paint:


But do that basic thing in grabber blue (ford) and black.

Tomorrow will be different.

You've done good work, Mr. Moto!
 
  • Like
Reactions: Motomicah
#683 ·
You know, with as much time as I have to ponder what to do, when it comes time TO do, I sometimes mutter to myself why the hell did I start this mess? It was s nice rider to begin with...

But I digress. My current stream of over thought stems from your great retro tank paint.

I love the 900f paint:

View attachment 23362

But do that basic thing in grabber blue (ford) and black.

Tomorrow will be different.

You've done good work, Mr. Moto!
There have been many times I've wondered the exact same thing haha. Usually when I break something, or I mess up (lot's of thinking to myself "what am I doing?!" while painting the tank).
But once the bike is done and you stand back and look at it, or get on for that first ride, it all seems worth it......well....most of it :p

I am really digging that paint too! Love how it flows from the side covers to the back part and the small red lines on the sides of the larger red line.
The world is your oyster my friend, I am sure you'll get the strength and motivation to keep moving forward and come up with a great design! Just keep that gorgeous vision of the bike in the forefront of your mind!

Thanks for support Farmer John, I am looking forward to seeing your bike complete!
 
#684 ·
Bike has been running great! Taken it for a few rides now and just working out the little bugs. Adjusted the chain and checked the valves, need to tune the carbs a bit too as it is running a bit rich.

But yeah, loving the bike a lot! While I was out for a ride I stopped at the park and grabbed a few better pictures.


Will keep you guys updated as the build progresses.
 
#690 ·
Dude, I've been following your thread since the beginning and all I can say that all the work you have put in this bike is amazing. The passion and persistence you have put in your bike is an inspiration to many new bike lovers. No mater what other say you just keep going foreword holding to your goal. Not to mention all the info you have given while building this bike. And in the end the bike looks great, everything matches and all the details make the bike outstanding.
This is a great example of how each of us should approach to their builds - passion and love of what you are doing.
Good work Sir!
:hatsoff:
 
#687 ·
Nice.
How's the hugger hanging on?
The tire hugger is attached to the bike via two tabs that I welded to the swing arm. The arm had a nice little groove in it where the original metal was fabricated, and it allowed me to place the tabs against it and fill in the gap with a good line of weld. Nothing extremely strong, but enough to hold the hugger in place without worry.

Kind of hard to grab a picture with the tire on there, but hopefully you can see what I mean:


And the fasteners I re-used from the bike. I believe they were the bolts that held on the original rear fender. I liked them because they had a smooth head and didn't stick out so much:

 
  • Like
Reactions: OCR and Volaussie
#688 ·
Hahaha, you have found my secret spot :p
Ooooo I like that idea......guess what my next picture will be of......

Thanks buddy! Hopefully I'll see you around the city sometime!
 
#689 ·
Micah, the bike looks great! Love some of the details you put into it. Have a few questions, not sure if you addressed them already or not but I'll ask them anyway.

1 - Would you be willing to pre-fab the plate holder? And how much would you charge?

2 - What did you do about the battery box? Made it yourself? If so, what did you attache it to?

3 - How close is the brake pedal to the exhaust? Does it touch? I am seeing this problem currently on my build.

Love the tire hugger and plan to do the same thing. I took out the regular battery and airbox but kept the plate the stuff was on. I plan to put in the hugger so that then I can chug a bag under there when traveling long distances.
Really like the custom fab dash. I was thinking of doing something very similar but kind of gave up on the idea. Think I'm just going to get a temp gauge and leds and just not use a speedo and tach. What do you think? Have you felt like you need the speedo and tach now that you've rode around in it a bit?
 
#691 ·
Thanks chop88! I'm glad you like the build, it was a pain but glad it's in the final stage now haha.

For the questions:

1. As much as I enjoyed making the plate holder for the bike, I don't know if I would have the patience to make another one lol. There was a lot of little tweaks and modifications to get it to a place that I thought was acceptable. The problem is, what is acceptable for me might not be good enough for others, so if I were to make another one I couldn't guarantee the quality of the final product. The biggest issue I would face though is not having the tools and material to make another one. When I fabricated the holder, I was on my co-op work term and had access to a welder, mill, various materials, etc... but now that I am back in school I do not have access to these machines anymore. So unfortunately I don't think I would be able to make another unit, but what I can do is give you any details, dimensions, pictures and anything else you can think of to hopefully help you out.

2. Yes that is correct, I made the battery box myself. Again, I had access to a welder and materials so I was able to fabricate it before. I used SolidWorks (a 3D modelling software) to design the box, but messed up on the dimensions for the mounting tabs, so when the time came to build it I had to tweak the mounts a bit. For actually mounting the box, I used the original mounts for the H-box that was originally on the bike. There is one long bolt in the front that goes through part of the bottom of the engine case, and two smaller bolts at the back that mount to the frame. If you take a look under your bike you might be able to understand what I mean a bit better. So far the box is holding up well in it's location, but be in mind, it is a pretty tight fit if you use the stock battery size.

3. Funny you should ask haha, I have been meaning to work on that for a while now. The brake pedal does touch in some cases, but there are a couple ways to work around this. The simplest is to adjust the screw that varies the distance the pedal travels upwards. It should be screwed into a little piece on the brake pedal and the head hits a part on the frame which limits the travel. What I have been wanting to do is modify the brake pedal by bending it around the exhaust so it doesn't touch anymore. A lot of people make custom pedals, but if I can use the stock one it makes my life easier.

Definitely a good idea to have something that can hold stuff for long rides, that's one thing my bike is currently lacking and I might look into fixing that in the future.
The custom dash was again a lot of work, but I wanted something that was compact but gave me all the information I needed. Personally, I like having all the gauges on my bike. I could probable live without the tachometer, but like seeing my speed (helps avoid the tickets) and also the temp of the bike (helps avoid frying the engine). I do love the simplistic look of the single gauge that some people do, but like I said, I'd rather have all the information in order to ride the safest I can. Once you get more familiar with your bike you can problem drop the speedo and tach, but for starting out I would recommend keeping them on to get a good idea of how the bike performs.

Hopefully that helps a bit, and sorry again about the plate holder. If you have any other questions make sure to throw them up and I'll do my best to respond :)
 
#694 ·
Thanks so much! I have had a blast working on every part of the bike. I still really want to strip it all down and powder coat all the parts that I can, just for durability, but funding and time dictate that it won't be happening for a long time to come haha.
I must say that it is nice having everything finally coming together and having a bike that I can be proud of (and ride of course lol).
 
#696 ·
I am having way too much fun on this bike haha. I use it as my daily rider to school and back, and take it out on the weekends for rips around the country side. Runs like a top, and isn't too bad on the comfort level. Obviously not as good as the standard bike, but I've ridden for a couple hours without too much discomfort.

The seat is actually very comfy, and I am glad I did not take any padding out; I like it nice and soft the way it is. Still has enough room to fit a small passenger on there which is perfect for my girlfriend.

I'd like to lower down the foot pegs a bit, but with the mufflers the way they are it could be a challenge. We shall see in the future though.

The rear fender/license plate holder is working good. All bolts are holding well, and no visible cracks or defects in the welds which is good.

Tires are working great, along with the bb's used for balancing. No issues there, and the tires are performing very well. I would definitely buy them again!

Love the sound of the pods! I didn't realize what a difference they'd make, but when riding and cranking the throttle you hear the air being sucked into the carbs and it sounds incredible! Bike is slightly laggy below 3k rpm, but everything from then upwards is good. Around 5-6k is when it really pulls though.

Anyways, those are just some thoughts on the bike as I was riding it. If anyone is curious about any other aspect of the bike just let me know!


On the advice of Tanh I decided to go searching for a nice place with a pond or lake to grab some pictures. I found the perfect spot with an old steel bridge and a nice little lake, and I think the pictures turned out alright. I am by no means a photographer, so I am sure many of the other members photos on here will put mine to shame haha. But hopefully you guys enjoy!


#697 ·
Sunlight shows up the colors nicely too!
 
#700 ·
Thanks CxRacer! I didn't think I would have so much fun photographing the bike, but it's kind of cool trying out different things haha. There are a lot of nice spots around me to get pictures so that helps too. I will try not to overload you guys with too many photos though :p
 
#702 ·
Was just fooling around with a cool app and figured I should post some of the results. Nothing too impressive, but kind of neat:


I also found out that a black CX650 (possibly dark blue though or a CX500) with lightning bolts painted on the tank and side covers, lives just down the street from me. So if you see this post mystery rider (or if anyone knows of someone with a bike matching that description), we shall have to have a chat sometime, because I am interested in your bike :p
 
#703 ·
So after going for a few group rides with some friends, they noted that the signal lights on my bike are nice and bright, even in direct sunlight, but the brake light is pretty dim. I was hoping the flasher module would help a bit in terms of getting people's attention, but if they can't even see the light then it serves no purpose. Night time use is great, but just during the day the LED's are not bright enough.

So I am looking into adding some red LED's, similar to the ones used on the turn signals or something a little smaller.
The only issue I am having is wear to mount them. There is enough room between the signals and current brake light to fit the circular LED's I think, but I don't know how that would look with two round bulbs sticking out from either side of the current brake light.

If anyone has any ideas of something that would work better and look more slick I'm all ears!
 
#704 ·
That's a pretty snazzy looking tail light!
I was originally looking at getting something similar to that (not near as nice though) but had to change when I decided to go with the licence plate holder/rear fender thing.

Looking at the size though it says it's about 2" in diameter. That's perfect for the main brake light, but I think it might be a little big to fit on the back of my bike. I like the look of the LED strip I have on the bike now, but it's just not bright enough by itself. I think adding something small along with it should be fine though. Even though that light looks sick, I am not sure it would be a good secondary brake light just due to the size of it. Thanks for the link and details though Karl! :) Everything helps boost the creative process!
 
#705 ·
Oh snap! I must have misread your post and thought you were looking for a "main" brake light Micah. If I knew you were looking for a secondary brake light, I wouldn't have mentioned this one. lol. Sorry for that and I'm sure they'll be more than a few ideas thrown at you. I. MUST. LEARN. TO. READ. Pics looks great by the way man!
 
#707 ·
So J.C. over at CX500info.com did up a featured build article on my build and I must say that it looks awesome! Very honored to now be a part of the list of CX500 builds and so happy to see how many of you guys have enjoyed the bike. It really does mean a lot that I have such a supportive community behind me!

Here is the link to the article: Featured Build: Honda CX500 Canadian Cafe Racer by MotoMicah | CX500info.com and if you guys haven't checked out the rest of his website or build list, you should! There is a lot of great info there and also some of the best looking builds all put together in one place.

Thanks again J.C.!
 
#709 ·
Hey Micah, admiring your work once again and carefully inspecting the details to maybe steal one or two hehehe. What color did you paint the motor? Because it looks dark in some photos but lighter in others, or maybe it's just me. I can see it's definitely not black but it's darker than the original aluminum color.

Currently have my engine apart and am going to paint the casing. I just purchased some duplicolor cast iron to run some tests on color.
 
#710 ·
Thanks for the support Chop88! Lol, by all means steal away, I've done that a lot too :p

The color is actually cast iron, but it is the VHT brand, not the duplicolor. I was originally going to use the duplicolor, but when doing tests it had too much of a green look to it.
I picked up the VHT one and I was much happier with it. I purchased a can of VHT primer, 2 cans of VHT cast iron, and one can of the VHT clear coat. This combination has held up very well and I am quite pleased with how it looks.

In the picture you can see what I mean. VHT cast iron is on the left and Duplicolor cast iron is on the right:

 
  • Like
Reactions: Volaussie
#712 ·
Yeah I never really noticed until I got it sprayed on the clutch cover. It's not too bad, but I am happy that I made the switch to the VHT.
I agree, it's the perfect color to show off the engine and yet keep it very subtle.
 
#713 ·
Thank you for this. Good to know because I actually prefer the VHT it has higher temp thresholds if I'm not mistaken. Will be purchasing a set of VHT cans instead of the duplicolor. Just saved me a few bucks, thanks. Do you know if there's anything darker then the cast iron without being black?
 
#715 ·
No problem! Yeah the VHT is really good stuff in my experience. A little more expensive, but worth it in the end.
I can't think of anything that's darker, at least not from VHT or Duplicolor, but you might check some other companies to see if they have something. Volaussie might be right, you might be able to find something like anthracite. I cannot attest to the quality of the other products though unfortunately.
 
#717 ·
I used the engine enamel. The flameproof stuff is overkill. I used the black flameproof on my first engine, and the finish came out bad and rough, and I didn't like it at all. I found that the engine enamel stuck a bit better too, and after giving it the clear coat it looked really nice!